TIL
day35 TIL
dalooong
2023. 7. 9. 02:42
✅ HTML Form
💡 HTML Form이란? 사용자가 정보를 입력, 선택할 때 사용하는 태그이다. 즉, 서버로 데이터를 전달 할 때 사용한다.
✅ HTML Form과 Controller 간의 요청, 응답
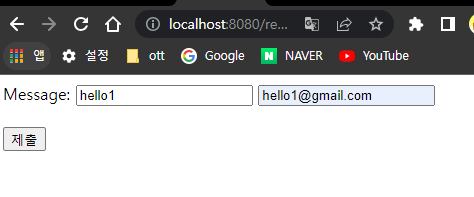
- send.html 코드
<!DOCTYPE html>
<html lang="en">
<head>
    <meta charset="UTF-8">
    <title>Send</title>
</head>
<body>
<form action="/receive" method="post">
    <label for="message">Message:
        <input type="text" id="message" name="msg" />
    </label>
    <label for="email">E-mail:
        <input type="text" id="email" name="email" />
    </label>
    <br><br>
    <input type="submit">
</form>
</body>
</html>
- FormController 클래스 코드
@Controller
public class FormController {

    @RequestMapping("/send")
    public String getForm() {
        return "send";
    }

    @RequestMapping("/receive")
    public String receive(
            @RequestParam("msg") String msg,
            @RequestParam("email") String email
    ) {
        System.out.println(msg);
        System.out.println(email);
        return "send";
    }
}

Form과 Controller의 데이터 요청 응답 흐름
- Form 을 통해 msg와 email이라는 이름을 가진 text를 보내는 방법 (“/receive” url로 요청을 보낸다.)
- Form의 요청이 “/receive” url로 요청이 온다.
- @RequestParam과 요청 데이터 이름을 일치 시켜서 데이터를 받는다.
💡 특정 메소드에 대한 요청만 받도록 제한
@RequestMapping의 경우 클라이언트가 GET 방식으로 접근하던 POST방식으로 접근하던 모두 접근이 가능하다. 이럴 경우 명확하게 메소드의 역할이 구분되지 않는다는 단점이 있다.
따라서 아래의 방법에 따라 메소드의 역할을 명확히 구분하는 것이 좋다.
- 어노테이션 설정
@GetMapping(value = "/send") // GET 메소드만 받음.
public String getForm() {
   return "send";
}
/send, /receive 만들기
- http 코드
<!DOCTYPE html>
<html lang="en">
<head>
    <meta charset="UTF-8">
    <title>Send</title>
</head>
<body>
<!--<http://localhost:8080/> 생략 가능 -->
<form action="/receive" method="post">
    <label for="message">Message:
    <input type="text" id="message" name="msg" />
    </label>
    <label for ="email">
        <input type="text" id="email" name="email" />
    </label>
    <br><br>
    <input type="submit">
</form>
</body>
</html>
- 컨트롤러 코드
package com.example.form;

import org.springframework.stereotype.Controller;
import org.springframework.web.bind.annotation.RequestMapping;
import org.springframework.web.bind.annotation.RequestParam;

//컨트롤러
@Controller
public class FormController {
    // send
    @RequestMapping("/send")
    public String getForm(){
        return "send";
    }

    // receive
    @RequestMapping("/receive")
    public String receive(
            @RequestParam("msg") //매개변수 파라미터
            String msg,
            @RequestParam("email")
            String email

    ) {
        System.out.println(msg);
        System.out.println(email);
        return "send";
    }
}

@RequestParam
: form에 첨부된 input의 데이터 중 name =”message”인 데이터를 String message 매개변수에 할당해 달라는 어노테이션
✅ CRUD
💡 CRUD란 ? 일반적인 컴퓨터 소프트웨어가 가지는 기본적인 데이터 처리 기능을 묶어서 말합니다.
기본적으로 어떤 웹 프레임워크를 접할 때, CRUD작업을 구현해보는 것을 목표로 접근하는 것이 좋습니다.
- Create : 생성 (insert)
- Read : 읽기 (selelct)
- Update : 갱신 (update)
- Delete : 삭제 (delete)
→ CRUD에 맞게 순서대로 만들어보자
1️⃣ CRUD - Create
- StudentDto 만들기
💡 Dto란? data transfer object의 약자 해당 객체가 통신을 통해 오가는 데이터를 나타내는 객체라는 걸 명시
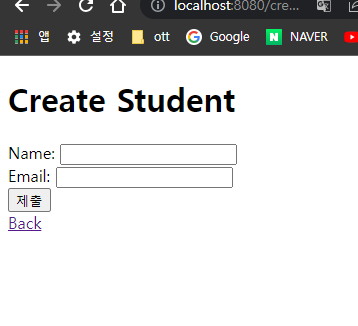
- Create.html
<!DOCTYPE html>
<html lang="en">
<head>
    <meta charset="UTF-8">
    <title>Create Student</title>
</head>
<body>
<h1>Create Student</h1>
<form action="/create">
    <!--  사용자가 제공할 데이터에 알맞은 input과 label을 만든다.  -->
    <label for="name-input">Name: <input id="name-input" name="name"></label>
    <br>
    <label for="email-input">Email: <input id="email-input" name="email"></label>
    <br>
    <!--  데이터 제출 버튼  -->
    <input type="submit">
</form>
</body>
</html>
- StudentController
package com.example.crud;

import org.springframework.stereotype.Controller;
import org.springframework.web.bind.annotation.GetMapping;

@Controller
public class StudentController {
    //create-view getmapping
    @GetMapping("/create-view")
    public String createView() {
        return "create";

    }
}
- StudentDto → Constructor, getter&setter 생성
package com.example.crud.model;

public class StudentDto {
    private Long id;
    private String name;
    private String email;

    public StudentDto(){}

    //constructor
    public StudentDto(Long id, String name, String email) {
        this.id = id;
        this.name = name;
        this.email = email;
    }

    //getter,setter
    public Long getId() {
        return id;
    }

    public void setId(Long id) {
        this.id = id;
    }

    public String getName() {
        return name;
    }

    public void setName(String name) {
        this.name = name;
    }

    public String getEmail() {
        return email;
    }

    public void setEmail(String email) {
        this.email = email;
    }
}
💡 Post 재요청 방지 redirect 사용
어떤 주소로 POST 요청을 보낸 후, 새로고침을 하면 동일한 요청을 다시 보내는 문제가 발생한다.
이때 redirect를 이용하면 기존 POST 요청을 정리하고 재요청을 방지할 수 있다.
return "redirect:/create-view"; //새로운 "create-view"로 redirect함

2️⃣ CRUD - Read All
1. StudentService 메소드 추가
@Service
public class StudentService {

    private Long nextId = 1L;
    private final List<StudentDto> studentList = new ArrayList<>();

    public StudentDto createStudent(String name, String email) {
        StudentDto newStudent = new StudentDto(nextId, name, email);
        nextId++;
        studentList.add(newStudent);
        return newStudent;
    }

    public List<StudentDto> readStudentAll() {
        return studentList;
    }
}
2. home.html 생성
<!DOCTYPE html>
<html lang="en">
<head>
  <meta charset="UTF-8">
  <title>Students Home</title>
</head>
<body>
  <h1>Student List</h1>
  <div th:if="${studentList.isEmpty()}">
    <p>No students here...</p>
  </div>
  <div th:unless="${studentList.isEmpty()}" th:each="student: ${studentList}">
    <p>번호: [[${student.id}]]</p>
    <p>이름: [[${student.name}]]</p>
    <p>이메일: [[${student.email}]]</p>
  </div>
  <a th:href="@{/create-view}">Create</a>
</body>
</html>
3. StudentController 수정
@Controller
public class StudentController {
    private final StudentService studentService;

    public StudentController(StudentService studentService) {
        this.studentService = studentService;
    }

    @GetMapping("/create-view")
    public String createView() {
        return "create";
    }

    @PostMapping("/create")
    public String create(
            @RequestParam("name") String name,
            @RequestParam("email") String email) {
        System.out.println(name);
        System.out.println(email);
        StudentDto newStudent = studentService.createStudent(name, email);
        System.out.println(newStudent);
        return "redirect:/create-view";
				//제출한 뒤 /home으로 보내려면 다음과 같이 작성
        //return "redirect:/home";
        //
        //return "home";으로 할 경우, 리다이렉트하는 게 아니라 "home"이라는 view를 보여줌.
        //단, 이때 현재 코드는 view에 필요한 속성값을 넘겨주지 않기에, 에러가 발생하거나
				//view가 제대로 표시되지 않을 수 있음.
        //실제로 view의 studentList.isEmpty() 부분에서 null 에러가 발생함.
    }

    @GetMapping("/home")
    public String home(Model model) {
        model.addAttribute("studentList", studentService.readStudentAll());
        return "home";
    }
}