
23-04-28 금
제어문
제어문이란 조건문과 반복문을 의미하며, 순서대로 실행되는 코드에 변화를 주는 명령이다.
자바는 코드를 위에서 아래 순서대로 실행하지만, 특정 조건일 때만 실행하거나 실행하지 않거나 반복을 해야 하는 경우도 있는데, 이때 제어문을 사용한다.
6-2) IF 문
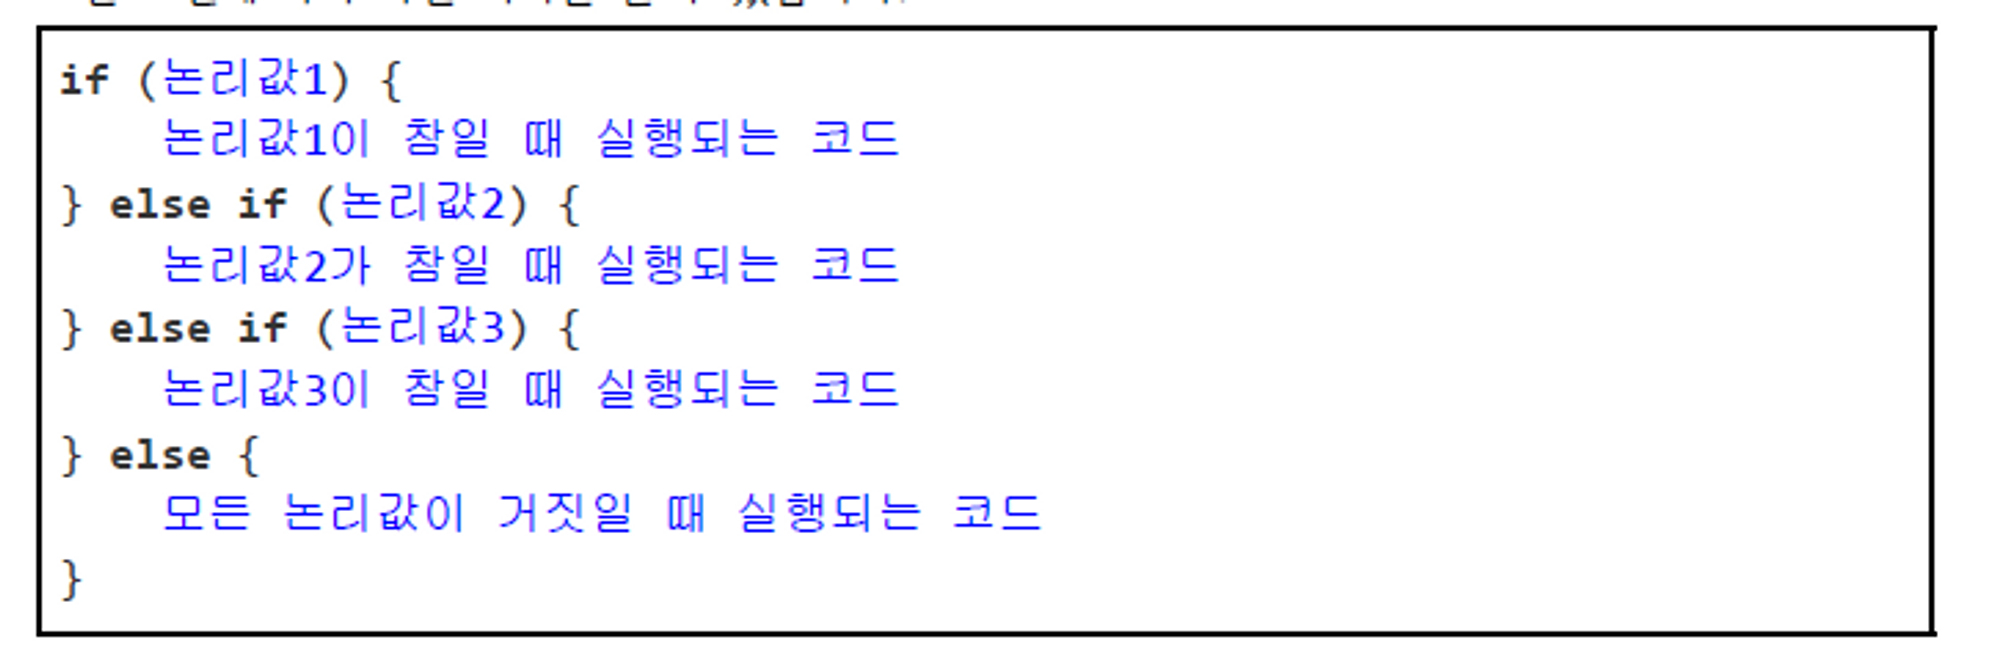
: if문은 논리연산이나 비교 연산의 결과로 treu또는 false값이 나오면 이 값을 기준으로 코드를 실행할 것인지 하지 않을 것인지를 제어할 수 있다.
조건에 따라 처리하는 프로그램의 진행을 변화시킬 때 if문을 사용한다.
사용방법:
if (논리값) {
논리값이 참(true)일 때 실행되는 코드
}

**** 비교 연산의 사용 예제)**
public class IfComparisonOperation {
public static void main(String[] args) {
int age = 20;
boolean isAdult = age >= 18; // boolean 타입 변수 선언
if(isAdult){ // 변수를 if문의 입력값으로 사용
System.out.println("성인입니다.");
}
if(age < 18){ // 비교 연산을 if문의 입력값으로 사용
System.out.println("미성년자입니다.");
}
}
}
- else 사용 : true와 false일 때를 나누어 처리하고 싶을 때 else를 씁니다.

예제 1번)
public class ElseExam {
public static void main(String[] args) {
boolean checkTrue = true;
if (checkTrue) { // 논리값이 true인 경우
System.out.println("true입니다.");
} else {
System.out.println("false입니다.");
}
boolean checkFalse = false;
if (checkFalse) { // 논리값이 false인 경우
System.out.println("true입니다.");
} else {
System.out.println("false입니다.");
}
}
}
//true입니다.
//false 입니다.

예제 2번)
public class ElseExam2 {
public static void main(String[] args) {
int account = 1400;
if(account >= 1500){
System.out.println("잔액을 차감합니다.");
} else {
System.out.println("'잔액이 부족합니다.'를 재생합니다.");
}
}
}
//'잔액이 부족합니다.'를 재생합니다.

예제 3번)
public class OddEven {
public static void main(String[] args) {
int num = 1;
if( num % 2 == 0 ){ // 2로 나누었을때 나머지가 0인지
System.out.println("짝수입니다.");
} else {
System.out.println("홀수입니다.");
}
}
}
//홀수입니다.
- else if사용
예제 1번)
public class GetGrade {
public static void main(String[] args) {
int score = 75;
if (score >= 90) { // false
System.out.println("A");
} else if (score >= 80) { // false
System.out.println("B");
} else if (score >= 70) { // true
System.out.println("C");
} else {
System.out.println("F");
}
}
} //c출력

예제2번)
int score = 81;
if (score >= 90) { // false
System.out.println("A");
} if (score >= 80) { // false
System.out.println("B");
} if (score >= 70) { // true
System.out.println("C");
}
실행 결과 B C
- 논리 연산자 사용
예제)
int x = 5;
int y = 10;
if (x > 0 && y > 0) {
System.out.println("x와 y는 모두 양수입니다.");
}
if (x > 0 || y > 0) {
System.out.println("x와 y 중 적어도 하나는 양수입니다.");
}
if (!(x > 0)) {
System.out.println("x는 음수 또는 0입니다.");
}
x와 y는 모두 양수입니다.
x와 y 중 적어도 하나는 양수입니다.

import java.util.Scanner;
public class BCompanyHRSystem {
public static void main(String[] args) {
Scanner sc = new Scanner(System.in);
int yearsOfExp = sc.nextInt();
int numOfProj = sc.nextInt();
if(yearsOfExp > 5 || numOfProj > 10){
System.out.printf("팀장 승진 대상입니다.");
} else {
System.out.printf("팀장 승진 대상이 아닙니다.");
}
}
}
//8 12 <Enter>
팀장 승진 대상입니다.
- 배열에서 자리바꾸기
import java.util.Arrays;
public class IfSwap {
public static void main(String[] args) {
int[] arr = {2, 1, 7, 9};
if(arr[0] > arr[1]){
int temp = arr[0];
arr[0] = arr[1];
arr[1] = temp;
}
System.out.println(Arrays.toString(arr));
}
//[1, 2, 7, 9] 출력
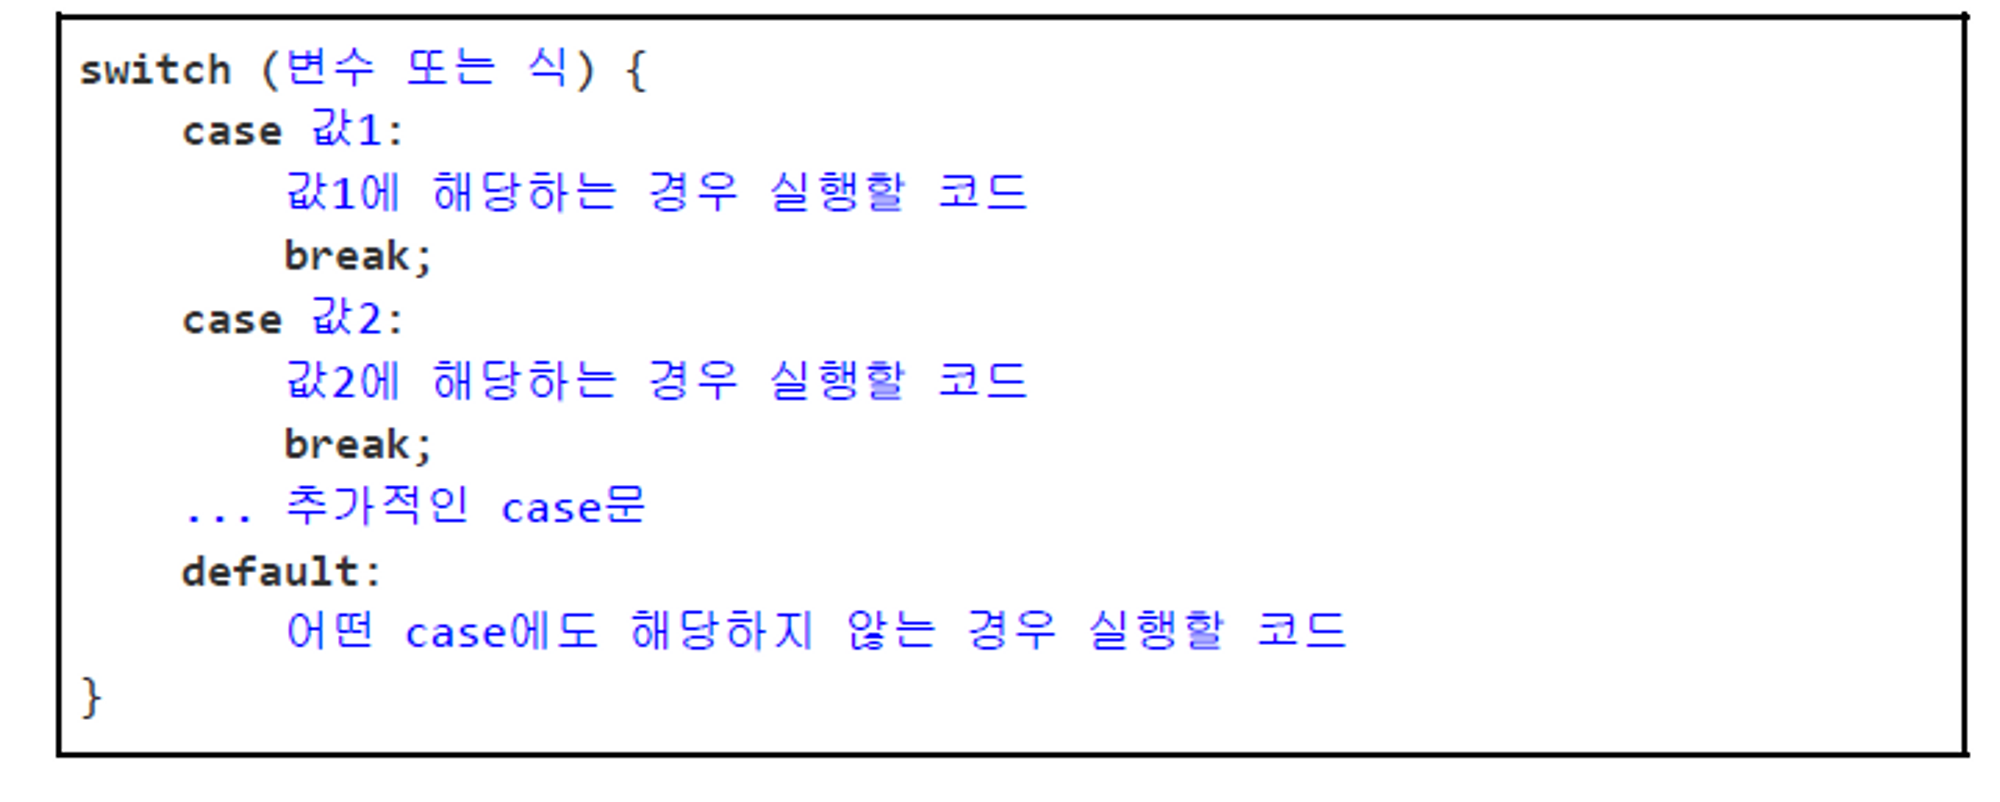
6-3) switch-case문
: 스위치 케이스 문은 if문과 사용법이 비슷하지만 한개의 값을 가지고 몇가지 조건들을 묶어서 처리할 때 사용하면 좋은 제어문
예제 1번)
public class IfSeason {
public static void main(String[] args) {
int month = 11;
if (month == 12 || month == 1 || month == 2) {
System.out.println("겨울");
} else if (month == 3 || month == 4 || month == 5) {
System.out.println("봄");
} else if (month == 6 || month == 7 || month == 8) {
System.out.println("여름");
} else if (month == 9 || month == 10 || month == 11) {
System.out.println("가을");
} else {
System.out.println("해당하는 계절이 없습니다");
}
}
} //가을 출력

예제 2번)
public class SwitchCaseDayOfWeek {
public static void main(String[] args) {
int dayOfWeek = 4; // 1: 월요일, 2: 화요일, ... , 7: 일요일
switch (dayOfWeek) {
case 1:
System.out.println("월요일");
break;
case 2:
System.out.println("화요일");
break;
case 3:
System.out.println("수요일");
break;
case 4:
System.out.println("목요일");
break;
case 5:
System.out.println("금요일");
break;
case 6:
System.out.println("Saturday");
break;
case 7:
System.out.println("일요일");
break;
default:
System.out.println(dayOfWeek+"에 해당하는 요일은
없습니다.");
}
}
} // 이렇게 사용해도 되지만 너무 길면 불편하므로 줄여서 사용할 수 있다.
public class SwitchCaseSeason2 {
public static void main(String[] args) {
int month = 3;
switch(month) {
case 12, 1, 2:
System.out.println("겨울");
break;
case 3, 4, 5:
System.out.println("봄");
break;
case 6, 7, 8:
System.out.println("여름");
break;
case 9, 10, 11:
System.out.println("가을");
break;
default:
System.out.println("해당하는 계절이 없습니다");
}
}
}
** 간결하게 사용한 예제 (직관적이고 보기 좋다)
public class SwitchCaseSeason3 {
public static void main(String[] args) {
int month = 3;
switch(month) {
case 12, 1, 2: System.out.println("겨울"); break;
case 3, 4, 5: System.out.println("봄"); break;
case 6, 7, 8: System.out.println("여름"); break;
case 9, 10, 11: System.out.println("가을"); break;
default: System.out.println("해당하는 계절이 없습니다");
}
}
}
- 진료시간을 switch-case로 표현하기

예제1)
public class SwitchCaseClinicHours {
public static void main(String[] args) {
String day = "월";
String time = "휴진";
switch(day) {
case "월", "화", "목", "금": time = "09:30-18:30"; break;
case "토": time = "09:30-13:00"; break;
case "수", "일": time = "휴진"; break;
}
System.out.printf("%s요일은 %s입니다.", day, time);
}
}

실행 결과
월요일은 09:30-18:30입니다.
예제2)
public class NewSwitchCaseSeason {
public static void main(String[] args) {
int month = 11;
switch(month) {
case 12, 1, 2 -> System.out.println("겨울");
case 3, 4, 5 -> System.out.println("봄");
case 6, 7, 8 -> System.out.println("여름");
case 9, 10, 11 -> System.out.println("가을");
default -> System.out.println("해당하는 계절이 없습니다");
}
}
}
실행 결과
가을
1p~23p